
Getting Started
Before uploading, ensure you have:
- Editor or Administrator access to your WordPress site
- Files ready (images, PDFs, videos, etc.) in a supported format
Uploading Media via the Dashboard
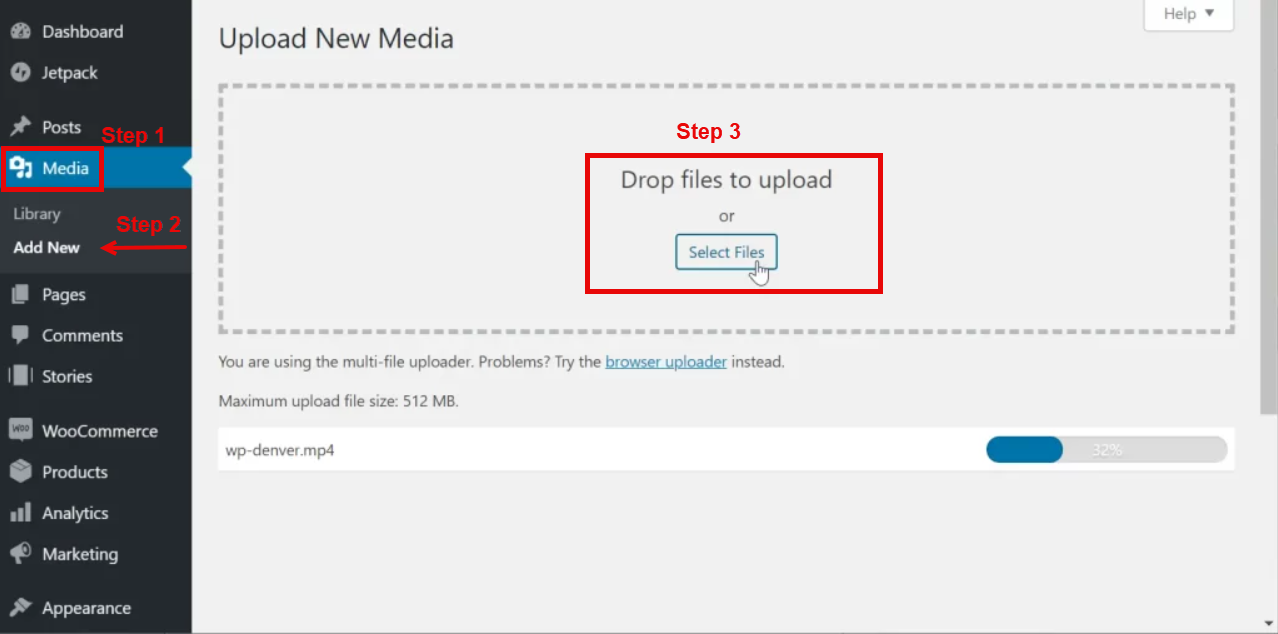
- Log in to your WordPress admin dashboard.
- In the left menu, click Media > Library.
- Click the Add New button at the top.
- Either:
- Drag and drop files into the upload area, or
- Click Select Files and choose files from your computer.
- Wait for the upload to finish. Files will appear in your Media Library.
Visual Aid:
Uploading Media Directly in Posts/Pages
- Open the post or page you want to edit.
- Click the (+) Add Block button and select Image, Gallery, or File.
- Choose Upload to add a new file, or Media Library to select an existing one.
- Once uploaded, the media will be inserted into your content.
Tip: You can also drag images directly into the editor.
Supported File Types & Limits
- Images: .jpg, .jpeg, .png, .gif, .ico, .webp
- Documents: .pdf, .doc, .docx, .ppt, .pptx, .xls, .xlsx
- Audio: .mp3, .m4a, .ogg, .wav
- Video: .mp4, .m4v, .mov, .wmv, .avi
Default Maximum Upload Size:
- Typically 64MB, but may vary.
- For larger files, contact support or use FTP.
Troubleshooting Common Issues
-
Upload Fails or Error Message:
- Check file type and size
- Try a different browser or clear your cache
- Contact support if problems persist
-
File Type Not Allowed:
- Only supported file types can be uploaded for security reasons
-
Upload Limit Exceeded:
- Contact your site administrator or hosting provider to increase limits (if you're hosting with another provider)